Before getting started you will recieve test credentials to aceess Qliro test environment. The API key will securly sent via 1password (Password management system). When your store is set up, you will recive the credentials to prod.
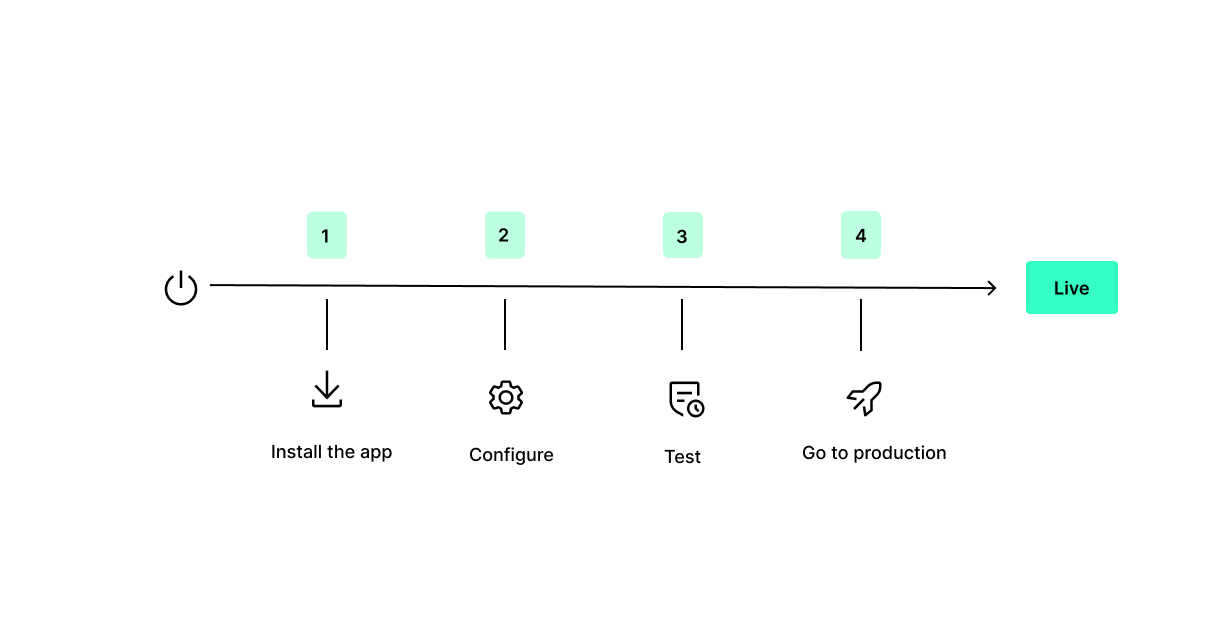
Follow this 4 steps to go live with your store !!!
Choose what apps you want to download for your store by clicking to the links above. After downloading the app, click on install, to finish the installement
Note: The payments app can not yet listed in the Shopify app store as they are new APP.:s The extention app is available from Shopify.
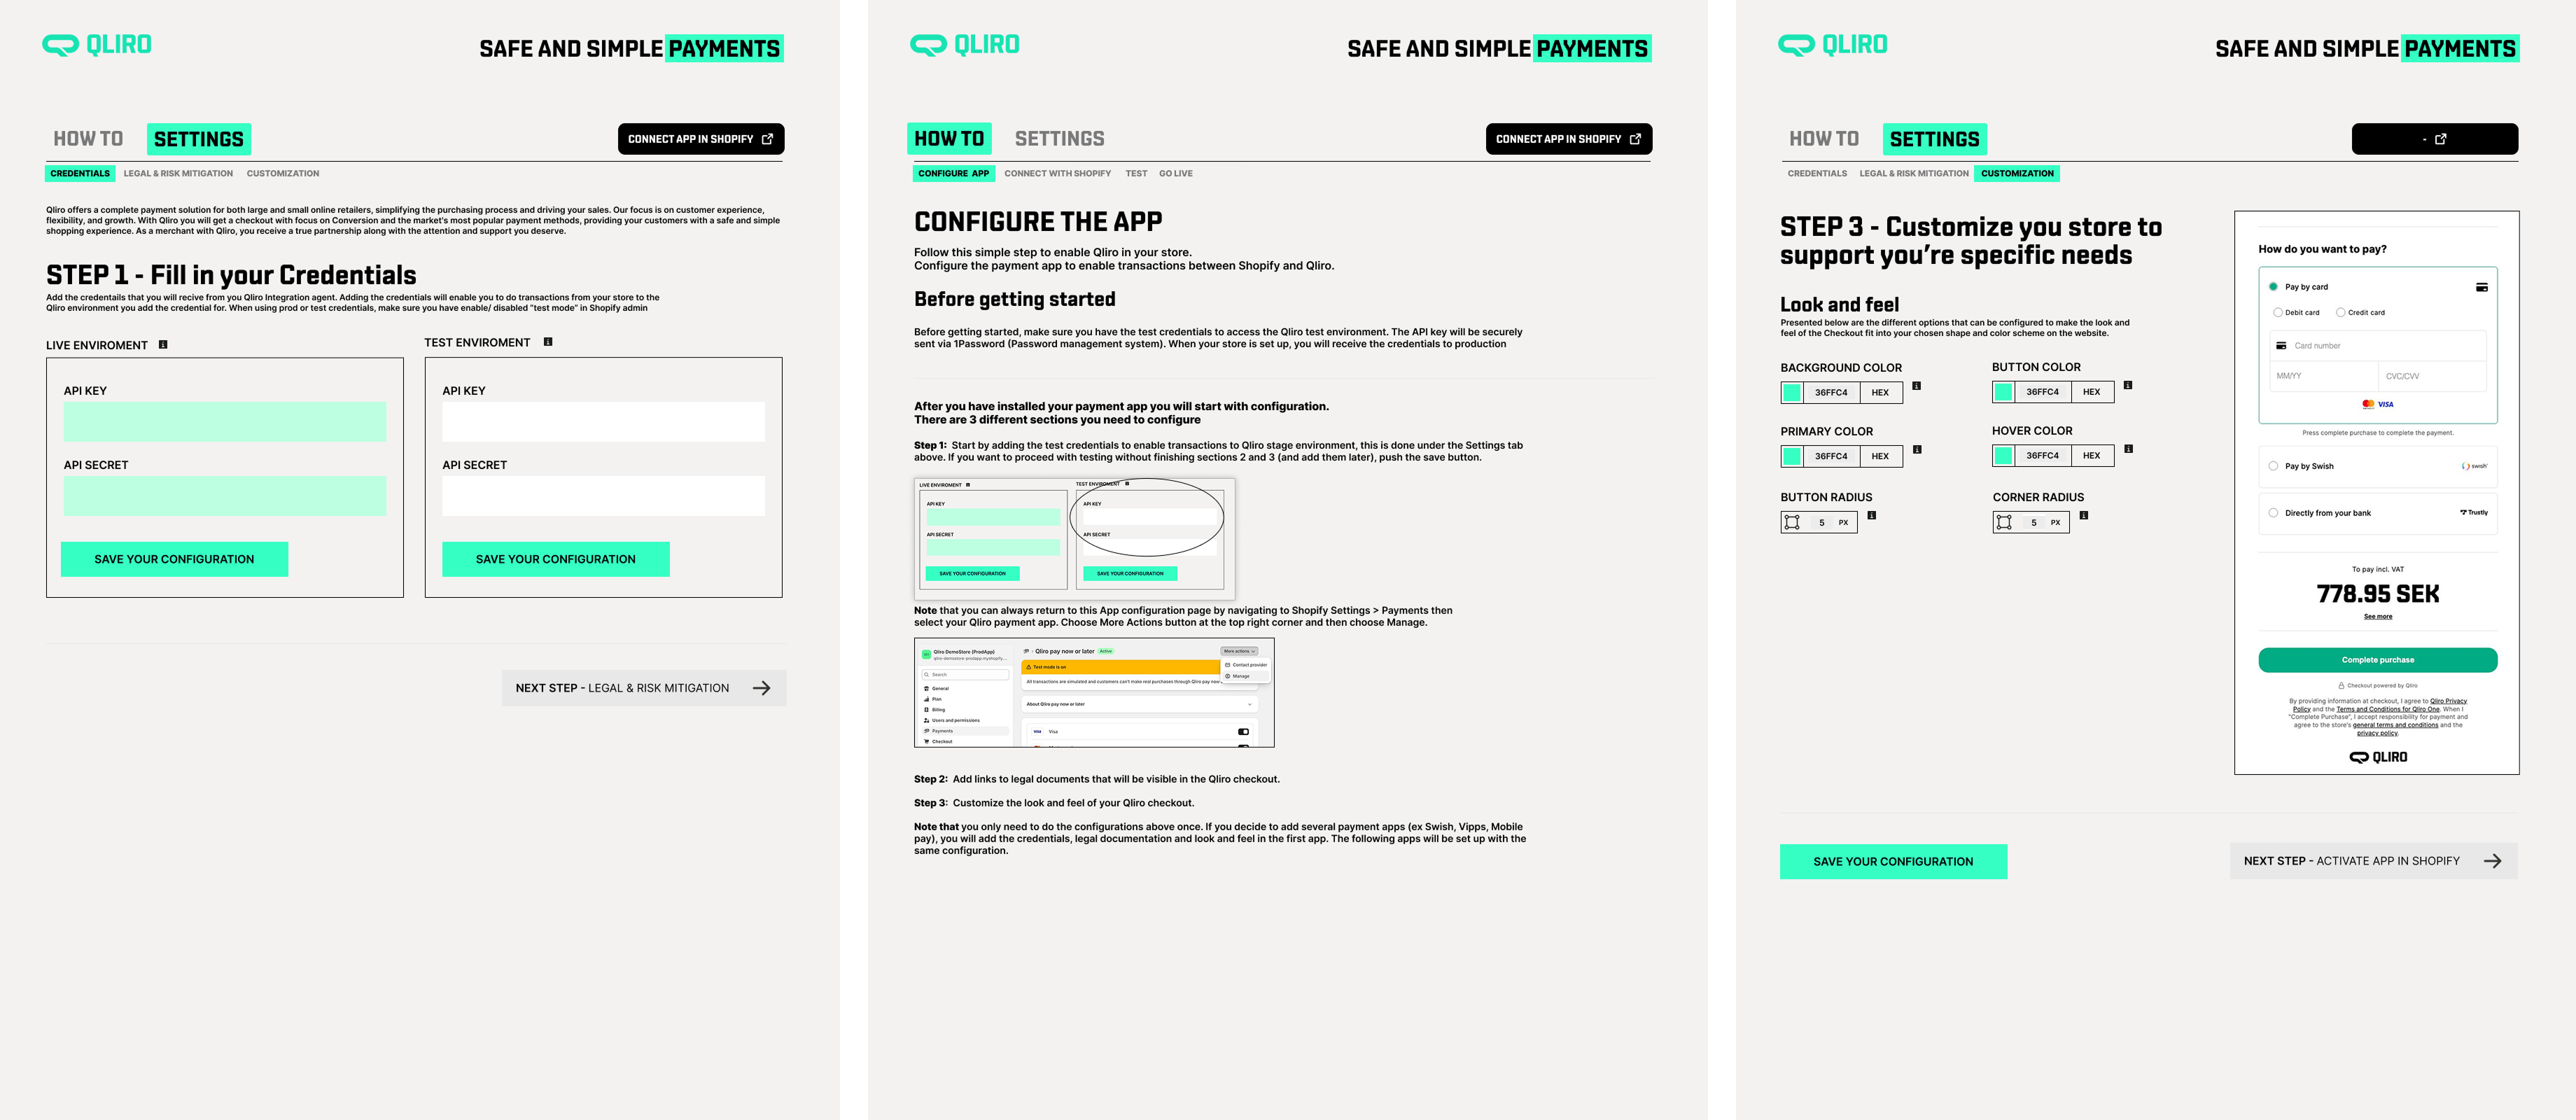
After you have installed your payment app you will start with configuring the payment app. There are 3 different sections you need to configure
Step 1: Start with adding the test credentials to enable transactions to Qliro stage environment. If you want to proceed with testing without finishing step 2 and 3 (and add them later), push the save button.
You can always return to this App configuration page by navigating to Shopify Settings > Payments then select your Qliro payment app. Choose More Actions button at the top right corner and then choose Manage.
Step 2: Add legal documents that will be visible in the Qliro checkout
Step 3: Customize the look and feel of your qliro checkout
Click "activate app in Shopify" to continue.
Note that you only need to do the configurations above once. If you decide to add several payment apps (ex Swish, Vipps, Mobile pay),you will add Step 1, 2 and 3 in the first app. The following apps will be set up with the same configuration.
In this step you need to connect your Qliro payment with Shopify and choose logos. This needs to be done with all payment apps that you want in your Shopify checkout.
Step 1 “When you are done with setting up the payment app click on “Connect app in Shopify", this will navigate you to Shopify admin tool.
Step 2 Choose what payment logos you want to connect to your payment app. The logos will be visible in the checkout for this app.
NOTE that all logos will be enabled per default, so disable the logos that are not applicable for your payment app
Step 3 Scrole down to the bottom of the page and push the activate button. This will connect your Qliro payment app to Shopify. Make sure to keep your test mode toggled on until you are ready to go live.
Before you start testing your store in Shopify, make sure the following are checked:
You have demo store in your Shopify
You are ready for testing!
- Go to your demo store and create and order by use our testdata
- Confirm that orders has been created properly : in Qliro Merchant web
- Test order management in Shopify admin tool
- Done !
You don´t have a demo store in Shopify
If you are missning seperate test environment and only have production, there is a risk that your customer can access your checkout when conduction tests and their purchase will end up in our test enviroment. To avoid this we have enabled a feature in our extension app that only makes your payment app visible for chosen user.
- Download the extention app together with your payment app (see links above)
- In your extension app, click on the "testing" tab
- Choose what payment app you want to test
- Add the email address for the test user
- Save configuration.
When you start to test, the Qliro payment methods will only be visible for the test users (emails) that you added. Once you have added the chosen email in your checkout , payment app will appear in Shopify checkout.
IMPORTANT! Dont forget to remove the emails users from extension app before going live to enable the the payment apps for all users.
You are ready for testing!
- Create orders from your Shopify checkout using our test data
- Confirm that orders have been created properly: in Qliro Merchant web
- Test order management in the Shopify admin tool
- Done !
To be able to test your new Shopify set up you need test data. With the test data you can simulate various transactions in the test environment and validate key functionalities. We provide both customer data from different Nordic countires with different order status and payment data to test Card and Trustly
If you are happy with your test, it's time to set your store to production.
Step 1: Go to Settings > Credentials and fill in the API Key and API secret and click on Save your configuration.
Step 2 : Go to your Shopify Admin and click Settings > Payments then choose Qliro payment app, scroll to bottom of the page and uncheck Test Mode
Make sure you have removed test user under "testning tab".
Your are LIVE !